Login IP-guard V3 Console, select the target computer (group) or user (group) that you want to apply the policy. Click on Advanced > Network

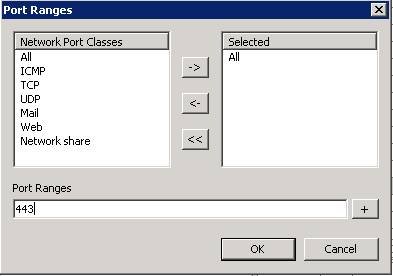
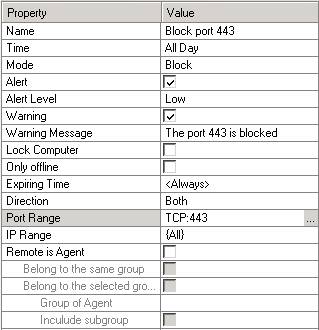
Enter the policy name from the Property window. Select “Block” for Mode value. Check the Alert check box, select the appropriate Alert Level. Check the Warning check box; enter your custom message in Warning Message area. Click on
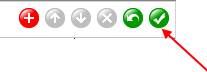
Click the tick button to save the policy setting
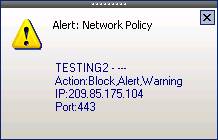
When user going to browse the website via https, IP-guard agent will block the specific port immediately
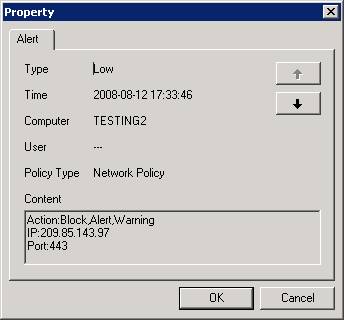
Administrator can click on the alert button to see the mail alert
Select the appropriate message to view the detail