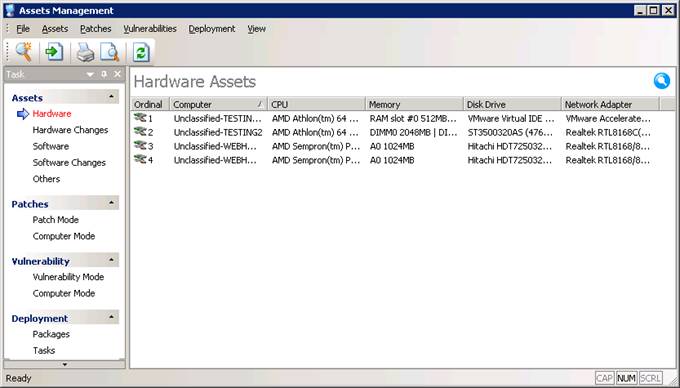
〉 Login IP-guard V3 Console, click on menu Assets > Assets
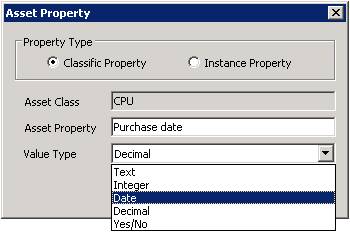
〉 Click on Assets > Asset Category/Classes Management. Specify which hardware component you need to custom. Click on Operation > New Property. Enter the Asset Property and select the Value Type. Click OK. Close the Asset Category/Classes Management window
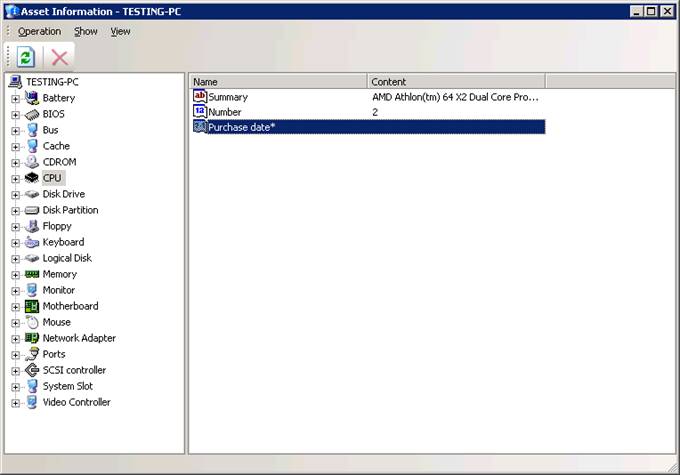
〉 Click on Hardware in Asset Management, right click the selected computer , select Property
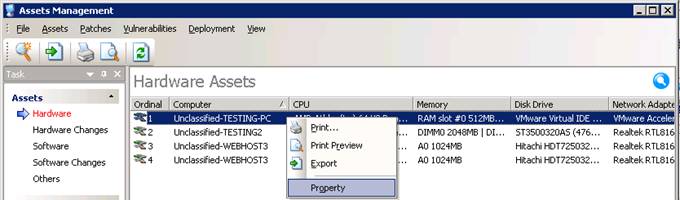
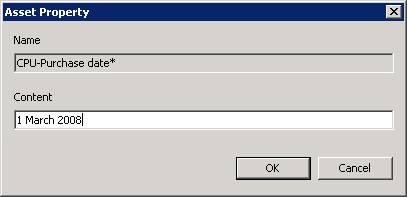
〉 Select your customized component. Double click the asset property
〉 Input data in Asset Property and then click OK
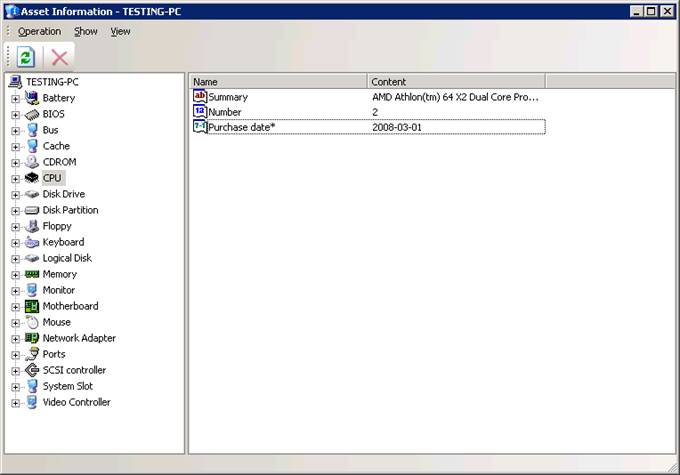
〉 You will find the data display in Asset Information window